
Another photographic challenge while in Europe was getting a good exposure when shooting dark buildings against bright, washed-out skies. Remember that the human eye can see a range of about 11 F-stops whereas the camera sensor can only "see" about 5. This presents a dilemma when attempting to capture a scene with very bright highlights and dark areas. A general rule of thumb is to expose for the highlights and let the darks go darker, just like in the film days.
There are a couple of tools that can improve photographing these situations. One is to use a graduated neutral density filter. This is a rectangular piece of glass that is dark at one end and gradually becomes clear at the other end. The filter is held in front of the camera lens with the dark end covering the bright part of the scene. This may help reduce the range of brightness and allow the camera to record all parts of the scene better.
A second option is using digital neutral density filters, such as found in Adobe Lightroom and some other photo editing software. The image is brought into the program and the digital filter placed over it and sliders are used to brighten or darken areas as needed. Keep in mind though that if there are overexposed areas in the original capture, there is probably no data for the software to work with. Always check your histogram and "blinkies" in the field to make sure that no important elements in your image are totally blown out.
A third option is to use High Dynamic Range software. HDR allows you to combine several images, each taken with different exposure settings, and combine them into one perfect picture. A few cameras, such as the Canon G12, have this feature built in. You push the shutter button, the camera takes 3 exposures in rapid succession and automatically combines them in the camera. This feature is still rudimentary but I believe it will become better and standard in future camera models. Probably not too far down the road, these new technologies will equal the seeing ability of the human eye and worrying about the range of light in an image will become less of an issue.
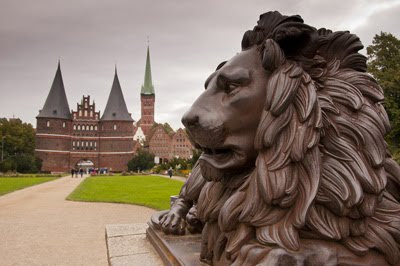
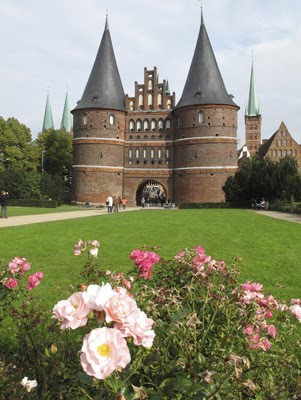
In the top image, the sky was very bright, but I was able to tone it down using a digital neutral density filter. In the second image, again the sky was a little too bright, but I brought out some detail with the filter. I also used the filter tool on the foreground flowers and then vignetted the corners to bring the viewer's eye more to the center.
No comments:
Post a Comment